Stop bleeding games on Shion — timing and resource discipline that actually stick
Four habits that tank your win rate on Shion and the deliberate mechanical rhythm that turns those losses into climbs.
TL;DR
- →DPS sub-role passives turn flankers into self-sustaining assassins
- →Evade is a hard dodge, not just a reposition — use it to bait and whiff key cooldowns
- →Joyride wins fights before you fire a shot — displace the support, then clean up
- →Overhealth on Evade is an aggressive trading tool, not a safety blanket
- →Quick-launch Joyride by toggling the midair launcher — skip the windup
- →Cross sightlines on Evade to deny enemy ult economy — overhealth is free HP
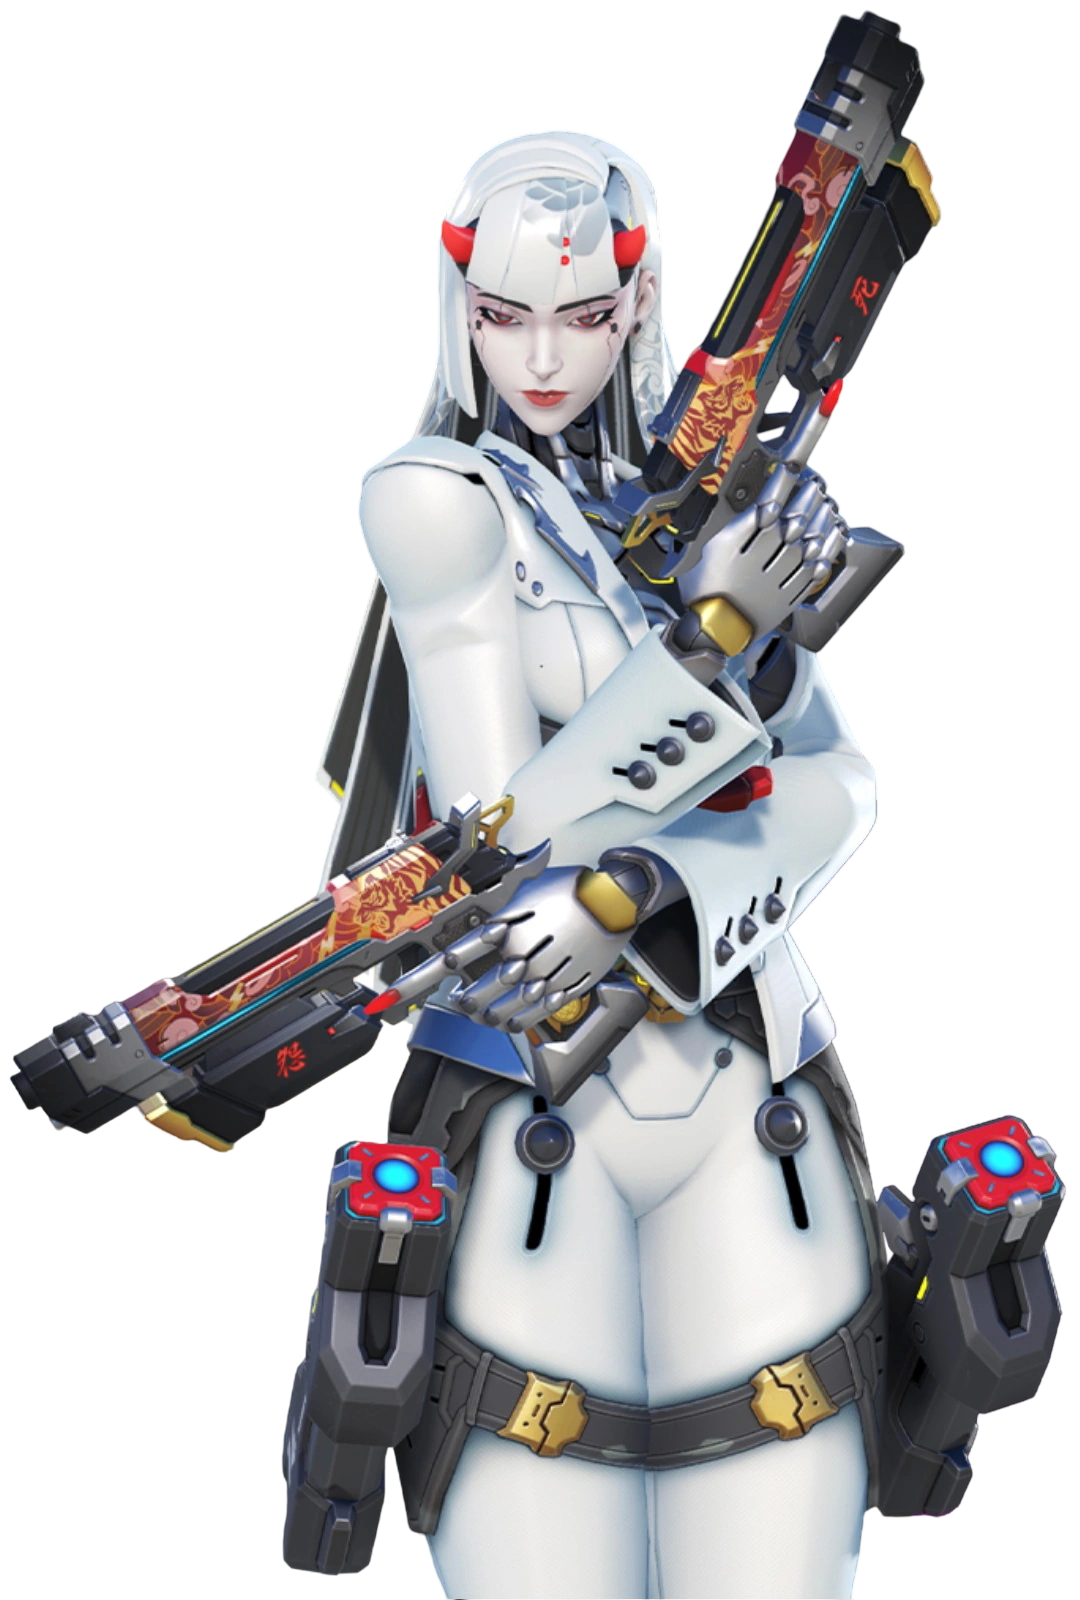
The habits costing you games on Shion
You have the kit. You hit the shots. But you still drop winnable games because you treat Shion like a brawler with a get-out-of-jail-free card. The difference between diamond and masters on this hero isn't mechanical ceiling — it's the discipline of when to commit and when to bleed out.
Shion's power budget is packed into two things: the dash's intangibility and the ability to act during it, and devastating displacement. Most players use these cooldowns on autopilot — dashing to dodge anything, biking into the whole team because the dopamine hit is too good. That's exactly how you lose. The footage below shows a different rhythm: a flanker who treats every cooldown as a trade resource, not a panic button.
Watch how the best Shion players layer overhealth and cleanse timing to absorb key cooldowns from Ana and Cassidy, then punish the wasted ability with . They don't use to angle — they use it to force the enemy to invest, then deny that investment with the intangible frame. isn't a movement ability; it's a zoning tool that forces supports off their perch and into your kill range.
The through-line is simple: play the cooldown game, not the DPS race. Shion wins by out-tempoing the enemy's decision loop. If you're not thinking about what the enemy wants to do before you press a button, you're playing a 1v5 with a paper shield. This guide walks you through the exact reads and mechanical chains that turn that 1v5 into a 1v1 you control.
DPS sub-role passives turn flankers into self-sustaining assassins
The major perk that bundles wallhacks on low-health enemies, faster reload on elimination, and reduced movement cooldowns on crits is exactly why Shion can chain kills through a backline without ever checking in with her supports. You see a red outline on a fleeing Ana — that's your cue to chase, not a suggestion. The reload speed buff after the elim means you're already ready for the next target before the first body hits the ground. And when you crit, your comes back faster, which is the entire engine for staying sticky on squishies. This perk doesn't make you stronger; it makes you stickier.
Evade is a hard dodge, not just a reposition — use it to bait and whiff key cooldowns
That intangible frame during is the single most underrated tool in Shion's kit. The footage shows exactly how to use it against Ana Sleep Dart — you hear the dart fire, you dash, you're gone. But the read goes deeper: you can bait the dart by playing aggressive on her flank, then dash through it to close the gap while the cooldown is down. The 75 overhealth is insurance for the follow-up, not the primary survival tool. If you're using just to move faster in a straight line, you're leaving a free kill on the table every 8 seconds.
Joyride wins fights before you fire a shot — displace the support, then clean up
The footage shows as a targeted displacement tool, not a rotation ability. You don't bike through the whole team — you pick the support who's sitting in a safe corner and you bump them into the open. The explosion radius is generous enough that you can hit Ana even if she reacts late, and the knockback forces her to waste her cooldowns just to stay alive. Once she's out of position, she's a free kill with . The mistake most Shion players make is using to get to the fight instead of end it. Reserve it for the moment a support thinks they're safe — that's the real value.
Overhealth on Evade is an aggressive trading tool, not a safety blanket
The 75 overhealth from isn't there to save you after you overcommit — it's there to win the duel during the commit. The footage shows a Shion using the overhealth buffer to absorb a bodyshot or a melee and still win the damage race. If you're dashing away from a fight, you're wasting the entire point of the ability. The correct rhythm is: take the first point of contact, dash forward to absorb the next hit, then finish with while the enemy is reloading. The overhealth buys you exactly one extra interaction — make it count.
Quick-launch Joyride by toggling the midair launcher — skip the windup
This is a tech that separates people who play Shion from people who use Shion. The normal launch has a slow-motion animation that telegraphs your intent and leaves you vulnerable. By toggling Midair Launcher and then , you skip that tell and launch the bike instantly. The footage shows this used for both engagement and escape — you get the bike out fast enough to catch a fleeing target or to zip around a corner before the enemy can react. If you're still holding the bike for the full windup, you're giving the enemy a free read on your movement.
Cross sightlines on Evade to deny enemy ult economy — overhealth is free HP
The lateral dash is a direct counter to the poke phase of any map. The footage shows Shion using the 8-meter dash to cross a dangerous choke while absorbing poke damage that would otherwise feed enemy support and tank ults. That 75 overhealth might not seem like much, but it's 75 HP the enemy doesn't get ult charge from. In a prolonged poke phase, three or four of those dashes can deny a full enemy ultimate. Time it right — just before you take fire — and you reposition for free while starving their economy.

Nano Boost turns Shion's ult into a team-wipe — but you need Shion to win the duel first
Ana· SUPPORT // TACTICIAN→The threat from Ana perspective is clear: when she holds Nano for your , the combo is nearly uncounterable. The damage reduction lets you survive the initial burst and the damage boost means your volleys one-tap squishies. But you can't Nano a dead Shion. The footage shows the Ana player waiting for the perfect moment — not just any ult, but the one where Shion is already in position and the enemy is grouped. That's the threat: a coordinated Ana will make you the win condition, but only if you don't feed before the engage.
Prevent the combo by forcing Ana to use Nano elsewhere. Play a fast flank angle that pressures her into using Nano on herself or a tank before your ult is ready. If she saves it, bait her Sleep Dart with (intangible frame), then commit the ult once her cooldown is down — she can't Nano a dart that never lands.
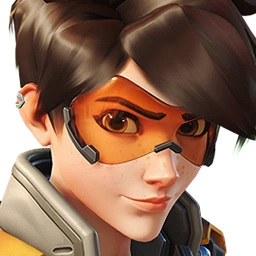
Flanker passive doubles health pack value — Tracer wins the sustain war if you let her
Tracer· DAMAGE // FLANKER→Tracer flanker sub-role passive makes a mini health pack worth 150 HP — a full heal for her, plus an instant uptime advantage. The footage shows her using this to stay in your backline indefinitely, never needing to recall for healing. If you're trying to out-sustain Tracer with normal pack usage, you lose. She can take risks you can't because her health pack economy is twice as efficient. The threat isn't her damage — it's her ability to re-engage faster than you can reset.
Force the duel onto your terms: land an burst at close range (140 damage) to take her to one-shot territory before she can blink. Then use to dodge her return fire and finish with Kira Pistols. Do not extend the fight past two clips — if she doesn't die, disengage and reset, because she will win the third exchange with pack advantage.
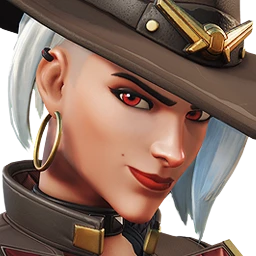
Ashe's high ground and two-shot kill ignores your overhealth — don't take the 1v1 at range
Ashe· DAMAGE // SHARPSHOOTER→The footage shows Ashe holding high ground and two-tapping Shion even through overhealth. 75 overhealth + 200 base HP is 275 total — a single scoped shot (85 damage) and a follow-up (85 damage) plus a second shot kills before you can react. The range advantage means your Kira Pistols fall off hard, and vertical mobility is poor — you can't bike up to her perch on Dorado first point without a huge windup. The threat is simple: if she's on high ground and you're on low ground, you die before you can close.
Take a different route to high ground — use the map's interior stairs or a teleporter, not . Once you're on her level, force a close-range duel where her scope is useless. Land an volley at 10-15m (still full 140 damage) and dash through her hyper-velocity to stay in her low-damage hipfire zone.

Cassidy's perk choice adapts to game mode — but his threat is always the same
Cassidy· DAMAGE // SHARPSHOOTER→The footage shows Cassidy making a smart perk adaptation: long-range major perk in 5v5 to poke flankers, fan perk in 6v6 for tank pressure. But no matter what perks he picks, his core threat to Shion is the Magnetic Grenade plus combat roll headshot. If he sticks you, you lose the overhealth and most of your HP. The long-range perk just makes the poke phase more dangerous before you can close. The key takeaway: Cassidy threat profile changes with the lobby size, but his kill condition on you doesn't.
Wait for him to use Combat Roll — that's your engage window. Bait the roll by faking an angle, then dive him with when his only defensive mobility is gone. Use the intangible frame to dodge the grenade stick, then burst with while his roll is on cooldown. If he holds roll, don't engage — poke from range and wait for a teammate to force it.
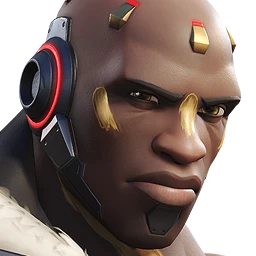
Doomfist's escape check is your engage window — punish the cooldown check
Doomfist· TANK // STALWART→The footage shows Doomfist own rule: check your cooldowns before diving. That's your single biggest opening. When Doomfist commits his Rocket Punch or Seismic Slam to engage, he's committed his only escape. If he doesn't have a second charge of Slam (and he usually won't early in the fight), he's a 400 HP sitting duck. The threat is that a good Doomfist does check cooldowns and never dives without an out — so you can't catch him overextended unless you force him to overcommit.
Anticipate when Doomfist will use Slam to escape (usually after 2 seconds of being shot). Pre-fire an at the spot he lands — the volley hits him the instant he exits power block or land from Slam. If you clip him, he's forced to use all cooldowns to survive, leaving him out of the fight for 6+ seconds.
Genji's dash economy is his only leverage — force him to use it on escape, not kills
Genji· DAMAGE // FLANKER→The footage makes it explicit: Genji dash is for finishing, not fleeing. When he uses it to escape, he's out of the fight for a full 8 seconds. The threat is a Genji who dives you with dash ready — he can secure a kill with right-click + dash and reset immediately. If he hits you with that combo, you're dead before you can react. But if you can force him to dash defensively, the fight becomes a 5v4 for the next 8 seconds. The whole matchup is about who controls the dash economy.
Never stand still in his right-click burst range (15m). Bait his dash by showing a low-HP angle, then backward as he dashes through you — the intangible frame makes his dash whiff. He now has no dash, no kill confirm, and is stuck in your backline without an escape. Land an burst while he's stuck, then finish with pistols.