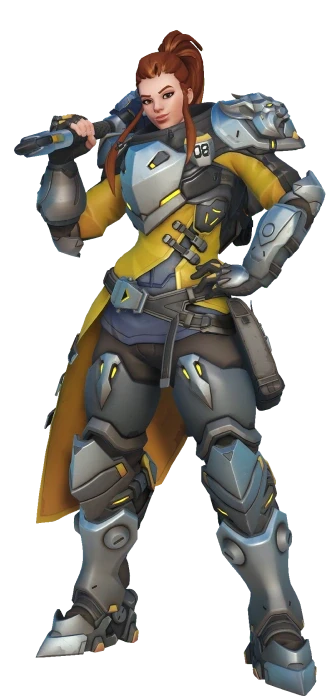
The resource discipline that unlocks brigitte on ladder
Four embed-level reads on Inspire uptime, shield economy, and matchup discipline — the habits that stop you from bleeding games you should win.
TL;DR
Stop playing Brigitte like a brawler who forgot her kit
You are losing games on Brigitte because you treat her like a melee heal-bot instead of a resource economist. The climb is not about hitting more flails — it is about having the right ability available at the exact moment the enemy's tempo cracks.
Every Brigitte plateau looks the same: you on cooldown, you into the frontline for a stun that gets you melted, and you pop the instant you hear an enemy ult — only to watch your team get burst through the overhealth. That is not bad aim. That is bad timing.
Brigitte's power lives in the gap between what the enemy wants to do and when they can do it. is a heal-over-time, not a burst save — if you are not hitting deployables to keep it ticking during poke phases, you are leaving healing on the table while your cooldowns rot. is not an engage tool; it is an interrupt, a reposition, and an escape. is not a panic button; it is a win-condition enabler that wins the fight before the enemy's burst even lands.
The matchups below show exactly how enemy players exploit Brigitte's weaknesses — and exactly how you punish them back. Read the footage. Fix the timing. Climb.
Hit turrets, not just torsos
does not care about your target’s health pool — it cares that you deal damage. Torb turrets, Sym turrets, Junkrat traps, B.O.B., even Illari pylon: all count as damage instances. If the enemy is playing range on you and your team is taking chip, walk to the nearest deployable, tap it, and your backline gets healed without you taking a single bullet.
Deployable healing is free uptime
Same mechanic, deeper read: you should be pathing toward deployables the same way a Tracer paths toward a health pack. If the enemy has a Symmetra, a Torb, or a Junkrat, you have a free battery. Maintain corner proximity, flail the turret or trap through the wall, and your team gets 100 HP/s for the next five seconds while you take zero damage. That is tempo you stole for free.
Block one or two waves, then bail
Venture Tectonic Shock is four waves. Your shield can block three. Do not sit there and eat all three. Block the first one or two — your backline lives through that — then out to safety. If your whole team is in the AOE and you cannot Bash out without leaving them, pop : the bigger shield and overhealth let you tank three hits while your team disperses. The point is preserving shield health for the next fight, not maxing your block count.
Rally buys time, not invulnerability
gives armor, a bigger shield, and overhealth — it does not give damage immunity. If you pop while your team is already eating a Graviton Surge + Dragonstrike combo, you just wasted the ult. The correct use is before that burst window: when the enemy is about to commit their tempo, not while they are already dealing the damage. The shield size increase means you can walk forward and take space, but if you eat a full Junkrat mag in the face you still die.
Range denies your entire value
Brigitte’s requires her to be in flail range. If the enemy runs Junkrat over walls, Bastion melting your shield from 30 meters, or Pharah/Echo/Soldier holding high ground, you cannot proc . Your entire healing output goes to zero. If the draft looks like this, you either swap or you play the hardest corner game of your life — never peek into that poke, wait for the enemy to dive into your range, and only then commit .
Break line of sight or the heal stops
The Survivor passive heals you for 15 HP per second after , Outburst, or Glide Booster — but any damage you take during that window cancels the regen. That means you cannot through a choke with an Ashe scoped in on you. The correct play is Bash into cover, break line of sight, let the regen tick for two full seconds, then re-engage. If you Bash into the open and take chip, the passive never fires and you wasted the cooldown.

Punish the booster trade — do not let her have both ammo and mobility
D.Va· TANK // INITIATOR→D.Va ammo perk gives her 150 rounds instantly but costs her Boosters. If she uses it aggressively, she is now immobile for four seconds. That is your window. her out of Micro Missiles range, then walk forward with and flail her face. If she tries to peel with Defense Matrix, she has no ammo and no Boosters — she is a fat target.
D.Va the moment she commits the ammo perk — she has no Boosters to close or escape, so you control the range. Follow with if she tries to fly away on cooldown.

Do not let him cycle headshots — deny the leap reset
Hanzo· DAMAGE // SHARPSHOOTER→Hanzo Sharpshooter passive resets his Leap by roughly 1.5 seconds per headshot. If he hits two in a row, he has his escape back almost instantly. You cannot out-melee a Hanzo who is landing headshots — you have to time your engage around his shot cycle. Wait for him to fire a Storm Arrow volley or a full-draw arrow, then into flail range before he can charge again.
Bait his arrow, Block with , then through his next shot start-up. immediately to keep him at flail range — he cannot Leap without a headshot, so you dictate the engagement.

Deny her the health pack double-dip — fight her before she reaches it
Tracer· DAMAGE // FLANKER→Tracer Flanker passive doubles small health packs from 75 to 150. That means a single mini-pad restores her to full. If you let her retreat to one, you lost the trade. The counter is to her the moment she blinks toward a pack, then to confirm the kill before she can reach it. You outsustain her by keeping active on yourself while she burns Recall.
Predict her pack path, hold for her blink toward health. Hit her, close with , then flail her while heals you. She burns Recall — now she has no sustain and you win the duel.

Break his deployable farm before he breaks yours
Winston· TANK // INITIATOR→Winston Tesla Cannon now deals 50% bonus damage to deployables — that means your , an Illari pylon, Torb turret, all die faster. He will dive your backline, zap your deployable, then tickle your supports. Your job is to him the moment he lands to interrupt the tick damage, then away to break line of sight. Do not stand in the Tesla cone — you lose the trade every time.
Winston at the end of his leap — he cannot dodge during the landing animation. Retreat behind corner while ticks on your team. If he commits Primal, to give your team overhealth and shield yourself from the knockback cycle.

Do not peek the two-tap — make her come to you
Ashe· DAMAGE // SHARPSHOOTER→Ashe two-taps Brigitte from high ground. Scoped body + scoped head = dead. You cannot her from elevation. The correct play is to play hard cover, wait for her to Coach Gun herself into your range, or wait for a D.Va or Winston to displace her. If you must peek, do it only after she fires — during her rechamber time you have a 0.6 second window to her off the high ground.
Play under cover until Ashe fires a shot, then peek and her off the high ground immediately. If she lands a headshot on you, away and cry it out — you lost the peek trade.

He wants to farm your shield — do not let him
Reaper· DAMAGE // FLANKER→Reaper Flanker passive gives him double health pack value (150 per mini). He will chip your for ult charge, then wraith to a pack and reset. Your job is to interrupt his health pack access with — same as Tracer. If he Wraiths away, do not chase; hold corner and let heal your team while he repositions. If he death-blossoms, through him — it breaks the ult channel and you survive.
Save for Death Blossom cast — hold Barrier toward him, wait for the audio cue, then Bash through him to interrupt the ult. During neutral, him when he tries to close into shotgun range; do not let him get the drop on your shield.