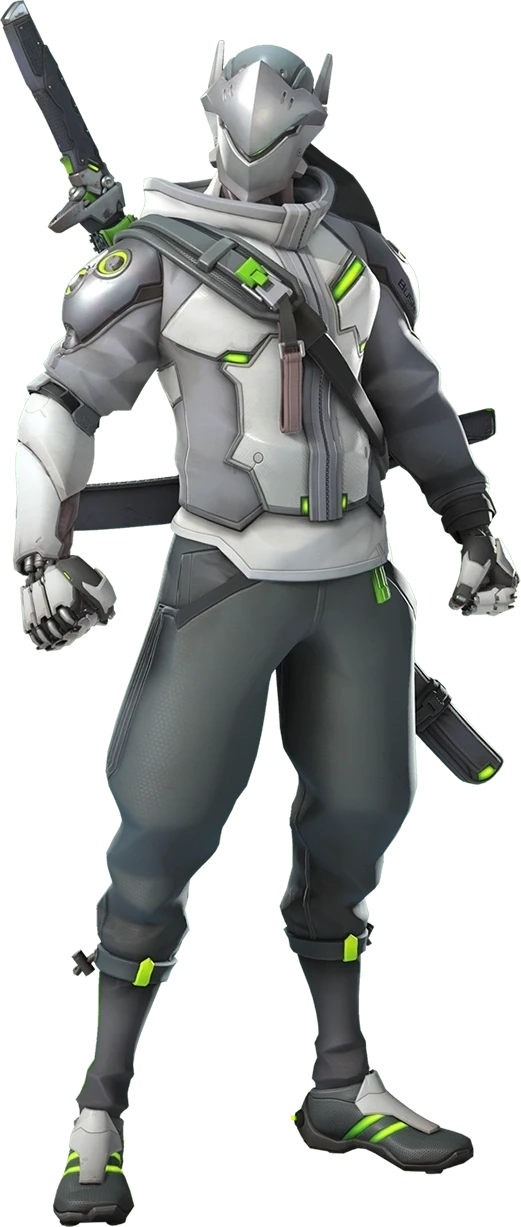
Stop bleeding tempo: The resource discipline that turns Genji from a feeder into a closer
If you keep losing games you should win on Genji, you're not missing mechanics — you're missing the habit of asking what you're trading before you press shift.
TL;DR
- →Your dash is a kill button, not a panic button
- →Mini packs heal you for 150 — path around them like they're a second support
- →Dash the floor, not the enemy — stop overshooting your own kill
- →If Deflect is down, you do not press W into the enemy backline — period
- →Close combat without Deflect is a death wish — wait the eight seconds
- →Aim groundward to cut your dash distance and stay in control
Your dash isn't an escape — it's a win condition
Generating value on Genji isn't about being flashy. It's about being deliberate with the resources that make him oppressive: dash reset, deflect uptime, and health pack efficiency.
The difference between a Genji who climbs and a Genji who hard-stucks in high Plat is almost never mechanical. You can hit the right-click headshot combos. You can blade. What you cannot do is stop pressing shift forward when you should be holding it, or jumping into a fight without off cooldown and expecting to live.
This guide doesn't teach you how to — it teaches you how to think about your tempo. Every dash is a trade. Every health pack is a resource. Every second is down is a window the enemy support gets to punish you. The footage below shows the exact habits that kill your pace: dashing out of fights instead of through them, diving without an exit plan, and ignoring the free sustain the game gives you on mini packs.
Climbing on Genji means treating your cooldowns like a budget. You don't spend dash unless the reset is likely. You don't commit to an off-angle unless is up. You path through small health packs because 150 HP on a short timer is worth more than waiting for your Ana to turn around. If you learn nothing else from this guide, learn this: Genji wins when his enemies have to respect his uptime. The moment you force them to wait for you is the moment you control the fight.
Your dash is a kill button, not a panic button
Every time you Dash to escape a fight you didn't need to take, you're handing the enemy a free window to reset the engagement. The dash reset on elim is the single most important tempo mechanic in Genji's kit — use it to secure kills, not to run. If you Dash away with no kill secured, you're now a slow wall-climbing bot for the next eight seconds, and the enemy Ana just got a free breather to heal her tank. Reserve dash for finishing blows; if you need to reposition, use your double jump and wall climb to create space.
Mini packs heal you for 150 — path around them like they're a second support
The flanker passive isn't a footnote; it doubles mini health pack healing from 75 to 150. That's a full third of your HP bar for picking a route you should already be taking. When you rotate through a flank angle, know where every mini pack on that map lives. One pack buys you 150 HP without asking your supports to break position. It lets you hold off-angles longer, farm more ult charge, and re-engage with pressure. Ignoring this is leaving free sustain on the floor.
Dash the floor, not the enemy — stop overshooting your own kill
Full-distance Dashing through a low-health target launches you past them into the enemy backline, often trading your life for a kill you could have secured cleaner. Short-dash by aiming at the ground near their feet: the strike damage still connects, you don't overshoot, and you land within range for the follow-up or the reset. This is the difference between a Dash that wins the fight and a Dash that trades one-for-one into a bad position.
If Deflect is down, you do not press W into the enemy backline — period
is your on-demand safety net against every hitscan, projectile, and ability the enemy throws at you during a dive. If you commit to a flank or a blade without it, one Sleep Dart, one Flashbang, one random Hanzo arrow ends your life before you get value. The rule is simple: on cooldown = you farm from off-angles at mid-range until it comes back. If you dive without it, you are betting your life on securing a Dash reset before the enemy reacts — and that's a bet you lose more often than you win.
Close combat without Deflect is a death wish — wait the eight seconds
Eight seconds. That's the cooldown. In that window, a Tracer can clip you, a Cass can roll-FTH you, a Moira can succ you through fade. If you close to burst range with on cooldown, you are a squishy target standing in the danger zone with no defensive active. The fix is simple: if is greyed out, stay at mid-range and farm until it's off cooldown. Then dive. is not a panic button — it's a pre-planned entry tool. Treat it that way.
Aim groundward to cut your dash distance and stay in control
Full-dash is 15 meters. If your target is at 5 meters, you fly past them and lose all follow-up pressure. By aiming your crosshair at the ground near their feet before pressing Shift, you shorten the dash to match the distance of the kill, landing exactly where you need to be to continue the fight or clean up. This is not a micro-optimization — it's the difference between getting the reset and spending the next four seconds walking back to the fight.

Cassidy's long-range perk punishes your poke — so respect his new threat zone
Cassidy· DAMAGE // SHARPSHOOTER→Cassidy long-range major perk turns his primary fire into a genuine poke weapon at distances. In 5v5, the fan damage perk is dead because there's only one tank to burst — so expect Cass to sit on high ground and contest your off-angle with threat from 30 meters. You cannot dry-peek him in that range. You must close distance fast, using full cover, and force him to duel you inside 15 meters where your burst combo beats his slower fire rate.
Wait for Cass to fire his primary once, then Dash into his face and hold . He will either panic Roll, which you can track, or he takes the volley. Close with a right-click burst — the fight is yours inside 10 meters.

Moira's resource management has a weakness — she has to expose herself to refill
Moira· SUPPORT // MEDIC→Moira energy refill trick (rapid tapping secondary fire instead of holding) means she can top off her healing resource faster than you expect, but only if she's actively beaming a target. That target can be you. If she's tapping you to refill, she is locked into a slow damage beam with no self-heal. This is the window to close: either force her to Fade early by applying pressure, or track her resource bar and push the moment she dips below 40% to heal her team.
her damage orb on entry; if she uses Coalescence, wait for the beam to lock, then Dash to the side and right-click her from an angle. If she Fades, you win the resource war — she can't heal for four seconds.

Symmetra builds her beam on tanks — so you break that rhythm by refusing to feed
Symmetra· DAMAGE // SPECIALIST→Symmetra level 3 beam is the only thing that makes her dangerous in a duel. She farms charge on shield tanks. As Genji, you are not a shield tank — you are a 200 HP flanker who should never stand still in her beam range. The second she starts ramping on your Reinhardt, you have a timing window: while she's focused on the tank, you can get behind her and punish before her beam reaches deadly output. But if you dash into her face while she's at level 1, she'll track you to level 3 in 2 seconds and melt you.
Never commit until she uses her teleporter or places a turret. Turrets have 1 HP; one kills them. If she has level 3 beam, wall-climb out of range and wait 3 seconds for it to decay — then re-engage with a right-click burst.

Sigma's hyper regen perk means poking him is pointless — commit or don't engage
Sigma· TANK // STALWART→Sigma Hyper Regeneration perk gives him consistent shield regen without needing Kinetic Grasp. That means your standard poke game of chipping from off-angles generates zero value — his shield comes back faster than you can break it. You cannot out-poke a Sigma with this perk. The only winning play is to either ignore him entirely (if he's not pressuring your team) or dive him with a hard commit using Dash and to close the gap before he can reposition.
Wait for Sigma to use his Accretion rock. Once that's on cooldown, Dash through his shield, hold to eat his primary fire, and burst him at close range. If he uses Grasp, just stop shooting — he gets no value, and you still have .

Winston's deployable damage buff changes his prio — he will shred your turrets, not you
Winston· TANK // INITIATOR→Winston 50% damage increase against deployables makes him a turret-clearing machine, but it does nothing against you directly. His Tesla Cannon still deals the same 60 DPS to players. That means his threat to you is the same as always: he zones with bubble, he denies space, and he chases low-HP targets. But the buff is a double-edged sword — if he's tunneling a Torb turret or a Sym turret nest, he's facing away from your backline, and you should be farming kills on his supports while he's distracted.
Winston bubble (10s cooldown) is your biggest problem. Dash into him only after he places it — then right-click his head from inside it. If he jumps on you, his Tesla (it does no damage to you) and Dash out through the bubble. He cannot chase you without Leap.

Zarya farms energy from Junker Queen's combo — your job is to not be the Junker Queen
Zarya· TANK // BRUISER→Zarya energy generation is passive: she bubbles the Junker Queen pull and gains 40 charge for free. As Genji, you are not the primary driver of Zarya energy — your tank is. You need to watch when your Junker Queen or Rein lands a big CD and anticipate the bubble. If Zarya is high energy (60+), you cannot duel her directly. You break her by forcing her to waste bubbles on body-blocking for your backline damage, not by feeding her charge with a reckless Dash.
Zarya cannot block your burst with bubbles — she has two bubbles with 2s uptime total. Poke her from an off-angle until she uses Personal Bubble (to cleanse or save herself), then Dash+right-click burst her. If she has high energy, wait for her bubbles to expire, then blade her.